

I was thinking of either tinting the windows or getting a cover. After some research I found that tinting would likely cost about $200.
So I started to look into a cover - hey it is still a tough economy no?
Even Rav4World doesn't have too many people using a cover, though I did find one person with a DIY plywood cover. I don't have a workshop or the tools to cut plywood pieces so my only solution was a fabric cover.
So for any more of you looking to make a cargo cover for your Rav, here goes. This is what you need,
Hollow curtain rails (Home Depot)
Wooden dowels that fit inside the hollow curtain rails (Home Depot)
Some kind of fabric, lightweight and not see through.
Small hooks with diameter that will fit in the headrest holes in the back seat.
Fabric glue.
2 Springs.
Ability to sew or a sewing machine.
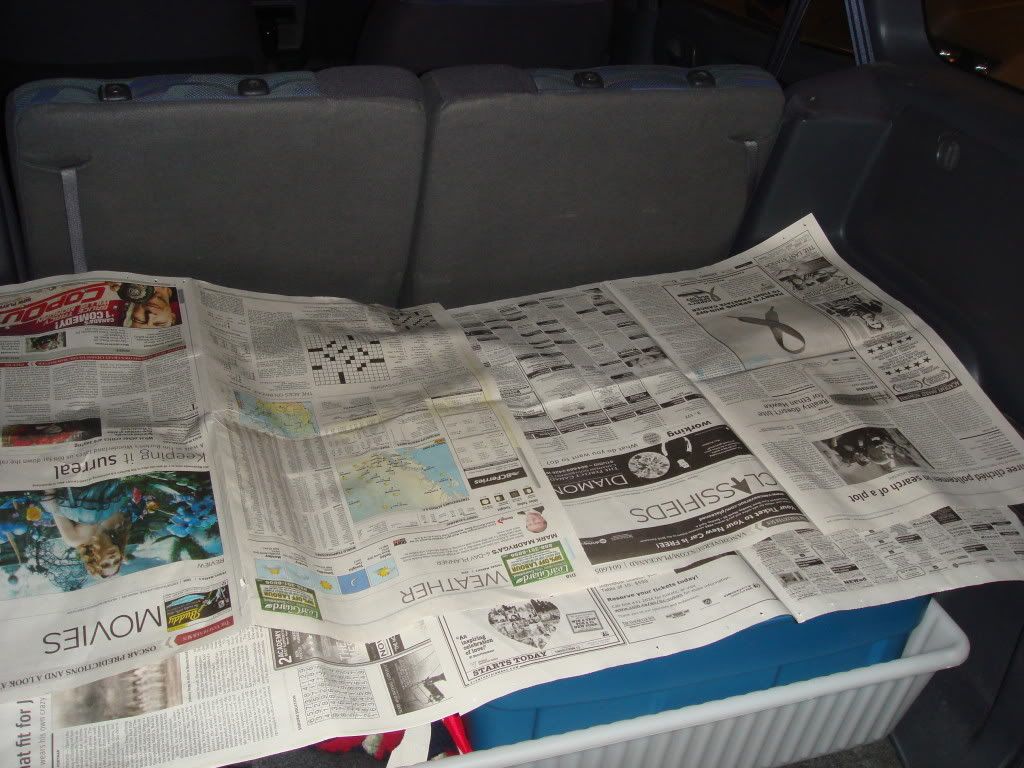
Use some newspaper and measure the area you need covered.
![Image]()
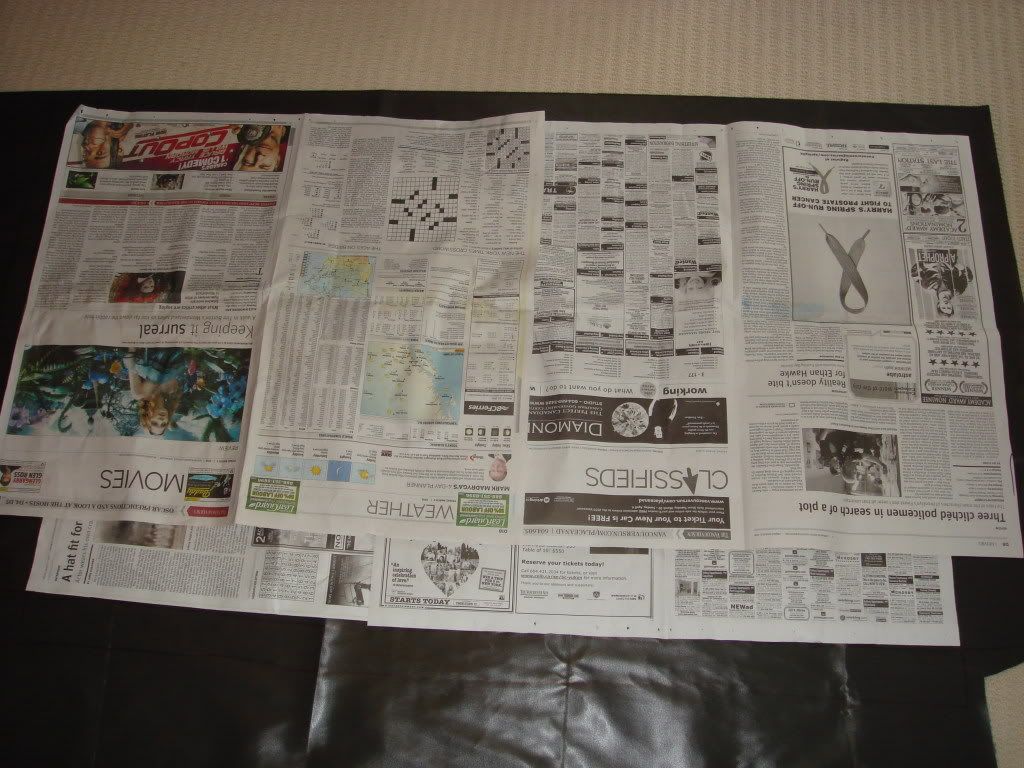
Cut out the pattern from the fabric.
![Image]()
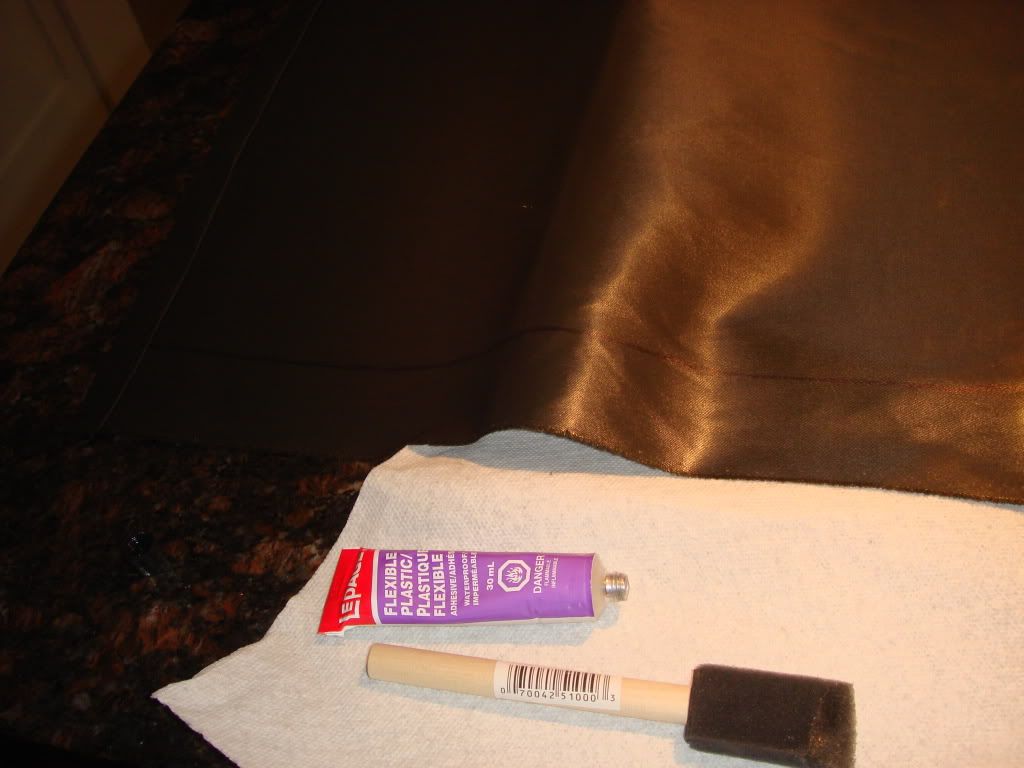
Glue the edges together for a more polished look. Make sure to leave enough space at the proper ends so that the curtain rods will go through!
I glued and sewed some of the edges. If you have a sewing machine, just sew all the edges. I don't have one so all I get is glue and sewing for reinforcement.
![Image]()
![Image]()
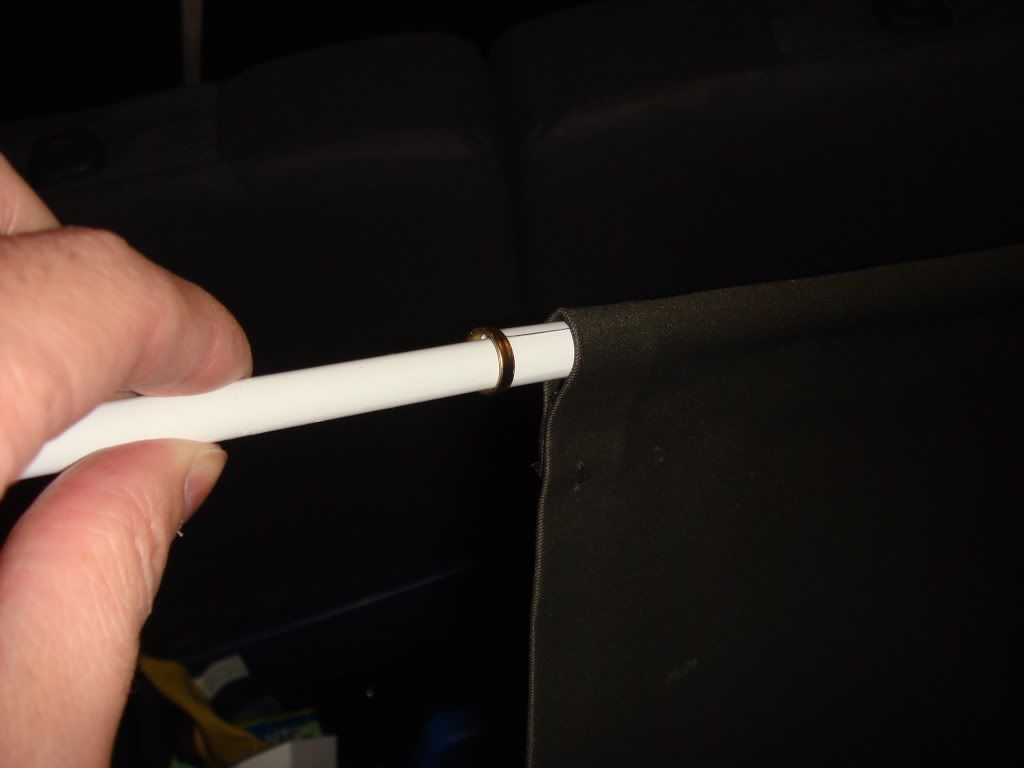
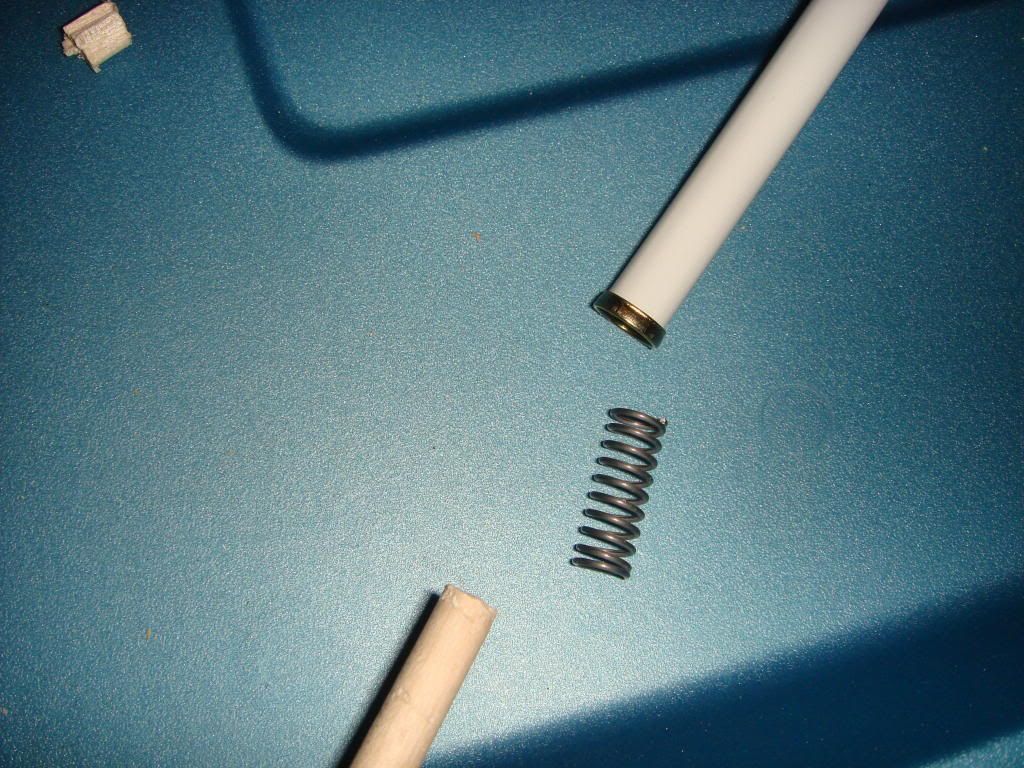
Cut the wood dowels to the right length and insert them in the hollow curtain rods.
![Image]()
Before adding the second end of the hollow curtain rod, add a spring! Now the two ends of the curtain rod will compress and will fit right into the small screw holes in the rear door frame!! Makes it easy to remove the cover when you need to.
![Image]()
![Image]()
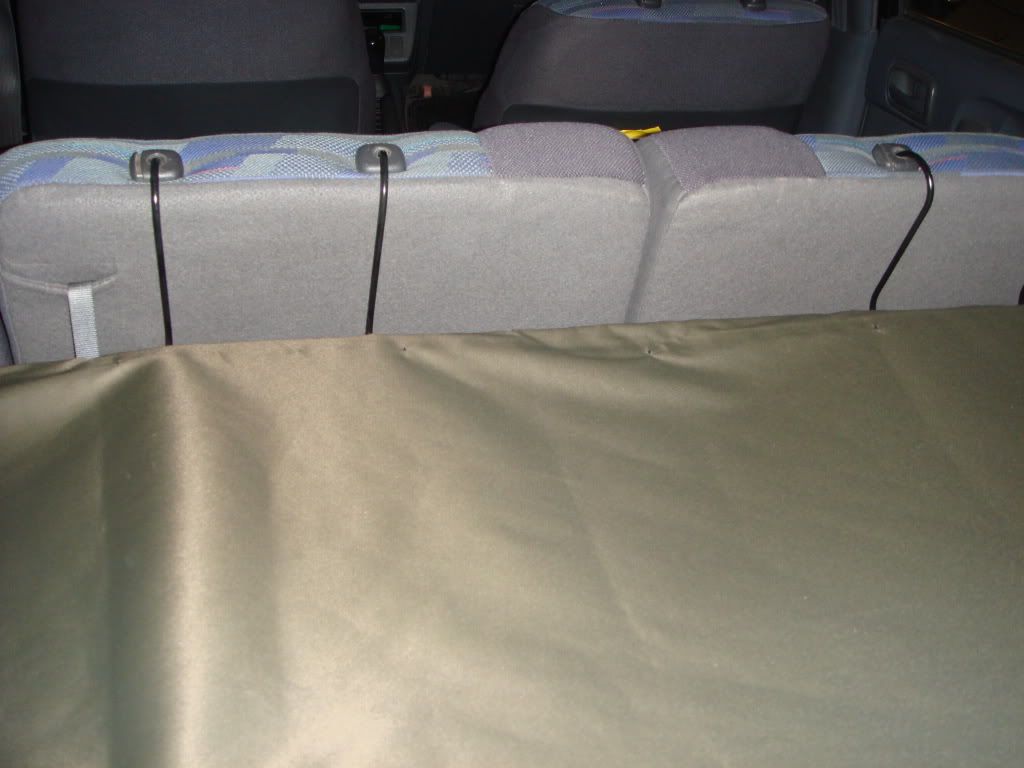
Add the hooks to the headrest holes in the back seat. I don't use the rear headrests but if you do an alternative is to use something that will tie them around the headrests.
![Image]()
The hooks will hold the end behind the seats! Now I should have bought smaller hooks. I'll get to fixing this later.
![Image]()
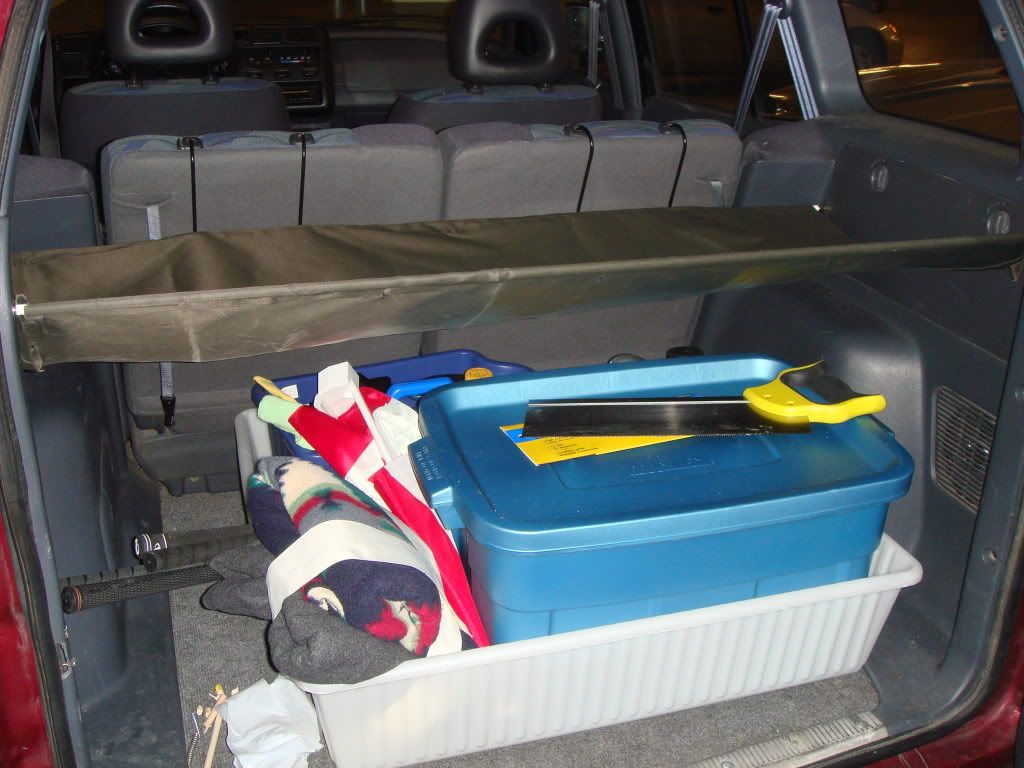
Now just install the other end to the door frame and you're done!! Covers the rear area and is easily taken out.
![Image]()
![Image]()
Total time was only a few hours cause I took my time to make sure it looked good. Great project for a rainy day...which it is in Vancouver, a lot!
Total cost was about $40.
This would be less if I knew what I was doing. I bought 3 dowels when only 2 was needed. I bought a huge swatch of fabric when a smaller one would have done. Also, when I bought the fabric at the fabric store it looked grey - to match my interior. But after I started working on it I realized that it is more of a dark green. Too late! I already cut the fabric! So you may want to take the fabric near the window of the store to see the color in natural light.
I'll also get around to tweaking it so it doesn't sag in the middle so much but I'm happy with it already!
So I started to look into a cover - hey it is still a tough economy no?
Even Rav4World doesn't have too many people using a cover, though I did find one person with a DIY plywood cover. I don't have a workshop or the tools to cut plywood pieces so my only solution was a fabric cover.
So for any more of you looking to make a cargo cover for your Rav, here goes. This is what you need,
Hollow curtain rails (Home Depot)
Wooden dowels that fit inside the hollow curtain rails (Home Depot)
Some kind of fabric, lightweight and not see through.
Small hooks with diameter that will fit in the headrest holes in the back seat.
Fabric glue.
2 Springs.
Ability to sew or a sewing machine.
Use some newspaper and measure the area you need covered.
Cut out the pattern from the fabric.
Glue the edges together for a more polished look. Make sure to leave enough space at the proper ends so that the curtain rods will go through!
I glued and sewed some of the edges. If you have a sewing machine, just sew all the edges. I don't have one so all I get is glue and sewing for reinforcement.
Cut the wood dowels to the right length and insert them in the hollow curtain rods.
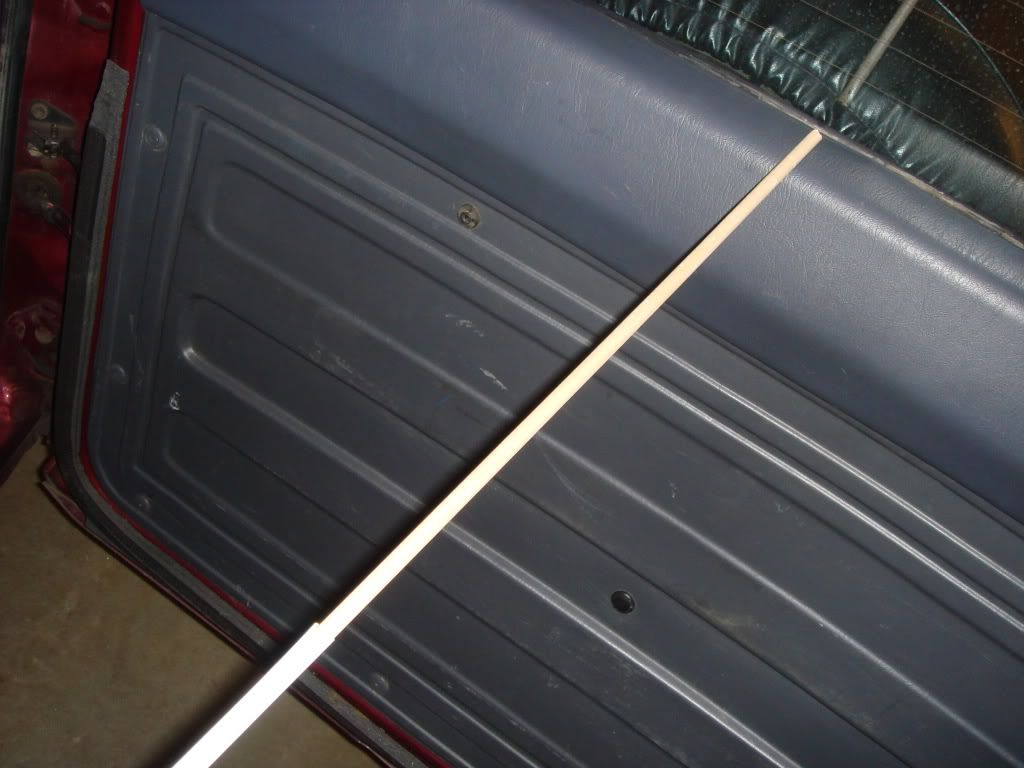
Before adding the second end of the hollow curtain rod, add a spring! Now the two ends of the curtain rod will compress and will fit right into the small screw holes in the rear door frame!! Makes it easy to remove the cover when you need to.

Add the hooks to the headrest holes in the back seat. I don't use the rear headrests but if you do an alternative is to use something that will tie them around the headrests.

The hooks will hold the end behind the seats! Now I should have bought smaller hooks. I'll get to fixing this later.
Now just install the other end to the door frame and you're done!! Covers the rear area and is easily taken out.

Total time was only a few hours cause I took my time to make sure it looked good. Great project for a rainy day...which it is in Vancouver, a lot!
Total cost was about $40.
This would be less if I knew what I was doing. I bought 3 dowels when only 2 was needed. I bought a huge swatch of fabric when a smaller one would have done. Also, when I bought the fabric at the fabric store it looked grey - to match my interior. But after I started working on it I realized that it is more of a dark green. Too late! I already cut the fabric! So you may want to take the fabric near the window of the store to see the color in natural light.
I'll also get around to tweaking it so it doesn't sag in the middle so much but I'm happy with it already!


