Toyota RAV4 Forums banner

Had problems with OEM Qi charger, so replaced with MagSafe

36K views 39 replies 18 participants last post by  Gymnbat  
#1 · (Edited)
** Updates **

Thought I'd share another project just so others know something like this is possible, not too hard to do, and is completely reversible.

In my 2021 Prime XSE, the OEM Qi charger was giving me fits as my iPhone 12 Max was recognized and started charging maybe 1 out of 8 times. When it did activate charging, most the time it would do so, stop after about 20-30 seconds and then flash the Qi's power button light... super annoying, and this happened with a case on my phone and without (so it wasn't a matter of distance)

Decided to do something about it, picked up the official MagSafe charger, an Anker 12v USB C power adapter, and a female 12v socket.

Followed this video on taking out the bottom of that cubby. They take off the top of the shift knob, but that's not necessary if you shift the shifter into neutral (and obviously sit there holding the brake pedal down), you can move the panel around the shifter up out of the way enough to get the bottom of the cubby out.

168143


168144


Flipping that over, you'll see 4 screws, 2 on each side, holding the OEM unit in from the sides, there are 4 clips holding it in as well

Where the power button is, remove those two screws that hold the cover, then push up the clip holding the ribbon cable and the cable will slide right out, so not you can hold the stock unit out completely uninstalled. I put this in a ziploc bag and added to my "Stock Rav4 Parts" bin.


168145


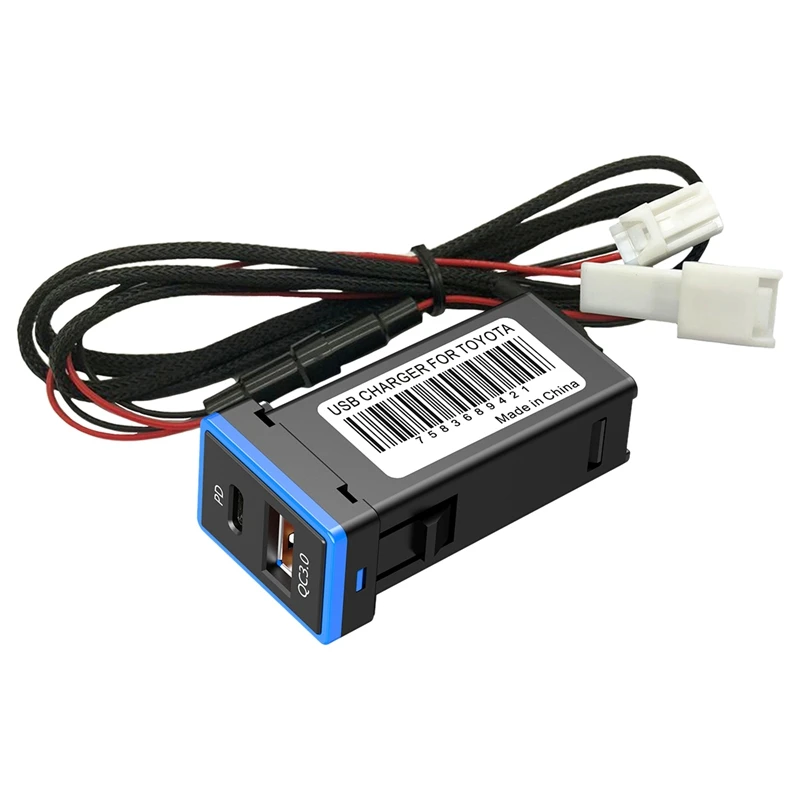
Here is the stuff to put in it's place

168146


Took some trial and error to get the MagSafe and my phone lined up correctly to charge, but once I found that sweet spot, I used 4 dabs of hot glue to effectively "tack weld" the MagSafe in place.

168147


Tested things out again (and again and again), once I was happy with the positioning, I put the cover to the stock power button back on and fully hot glued the MagSafe to the bottom side


168148


Wired up the 12v socket to the 2 pin plug for the stock 12v power source, white was 12v and that light blue-ish wire on it was the ground (warning: the two shiny 10mm back in the subdash are NOT ground spots, so don't waste your time with that lol).

Put everything back together, making sure to tuck away the MagSafe's wire to the side of the sub dash opening so the shifter rod won't catch it and here is everything up and working.

I haven't driven the Prime since I finished this earlier today, but in playing around with things and trying it out, I now reliably start the charging action on my phone. Here is a video of the charge starting as well at the end you can see my wireless CarPlay kick on from my CPlay2Air adapter.

 
#7 · (Edited)
** Updated Version ***

So already made an upgrade as my case of choice was maybe causing reliability issues.

So turned things up a notch and bought a basic replacement tray off eBay for $12 and went to work

169989


Used a hole saw that closely matched the diameter of the MagSafe puck and with a little filing down was able to squeeze it into place

For good measure used some JB Kwik to absolutely secure it in place, after it dried I moved the 12v socket and USB port over

169990


169993


Not shown: I bought one of these stickers to make the puck blend in better.

Now this starts charging my phone every single time, issue 100% solved !
 
#15 ·
The power source (that powers the OEM 12v socket) is on/off with the key, so I’m not sure there should be any concern about constant power draw.

Besides, no phone to charge = no load = no electricity being pulled. It’ll be the equivalent of worrying about your home charging staying plugged in (which is supplied power 100% of time), no one worries about that

To update on my setup: few days ago got my iPhone 13 Pro and have a “MagSafe compatible case” that has a white ring and alignment strip on it, it attracts itself to the MagSafe puck and works every time

Also: I’ve had 4-5 people message me privately about tapping into power, I figure when I get time today or tomorrow I’ll pull my setup apart and get some pictures of that part of things. I listed above all the parts needed and links to Amazon but judging by the messages I could expand on the execution a bit
 
#16 ·
The power source (that powers the OEM 12v socket) is on/off with the key, so I’m not sure there should be any concern about constant power draw.

Besides, no phone to charge = no load = no electricity being pulled. It’ll be the equivalent of worrying about your home charging staying plugged in (which is supplied power 100% of time), no one worries about that

To update on my setup: few days ago got my iPhone 13 Pro and have a “MagSafe compatible case” that has a white ring and alignment strip on it, it attracts itself to the MagSafe puck and works every time

Also: I’ve had 4-5 people message me privately about tapping into power, I figure when I get time today or tomorrow I’ll pull my setup apart and get some pictures of that part of things. I listed above all the parts needed and links to Amazon but judging by the messages I could expand on the execution a bit
@MorningZ, I'd definitely be interested in seeing those images of how you wired in the 12v socket for your setup. But I'm also considering substituting a USB-C socket connected directly to the MagSafe Charger instead of your 12V Socket/Cigarette Lighter Charger solution, so I don't have to worry about the charger coming loose from the 12V socket. Thoughts on this substitution using something like this, but leaving it all hidden under the tray/in the console?


And, if I also wanted to install one of these flush mount in the back of the tray (in addition to the one hidden in the console for the MagSafe Charger), could I install two of them using the pre-wired y-split cables? Any issues with splitting the power source for the OEM 12v socket to two of the USB-C sockets?

Thanks for the advice!
 
#18 ·
Same here...The stock wireless charging pad doesn't work with my Quad Lock case, but the one on my old Hyundai did. And I'm also curious about your wiring setup. Are you hooking into the 12V wiring from the original charging pad wire harness?

I wanted to power a dash cam with the stock USB port. It will turn on the camera, but it won't go into record mode. Might becasuse it's trying to access data and isn't giving enough power. I'm thining I can wire in a new USB port directly to the charging pad wire harness that I don't use.

Thanks for your posts and great info!
 
#19 · (Edited)
Sorry for the delay all, here is what I promised.

I'll revisit "parts list":
  • you'll need a 12v socket. Cut off the ring ends of the leads
  • a 12v USB-C power supply like this one (the exact one I use, but there are plenty of options)
  • the official Apple MagSage puck
  • I stripped back the casing from wires of the OEM 12v socket and soldered wires in from the 12v socket, but you just as easily use connectors like these if soldering isn't your thing

To give the overview again, this is the completed installation. The puck is raised up slightly to accommodate the “camera bump” as well to better connect to my phone through its case.

Image


Here are some pictures of the wiring.

The red tape and zip ties protect the soldered on leads from the 12v socket i added


Image


Here are the two wires on the backside of the stock 12v socket

Image


Just another angle off all things wired up and working absolutely great! It activates MagSafe charging on my iPhone 13 Pro every single time!


Image
 
#20 ·
thanks for all this detail @MorningZ
did this today in my rav4 prime se. i had a third party qi charging tray installed, but it was really bad— charged inconsistently and slowly, among other things.

i’m not confident in my soldering skills so i used the t-tap connectors, which are easy but i had to reset them once when after reseating the tray i lost power. i was more careful the second time and so far so good! it’s so much better than the qi.

Image
 
#30 ·
Finally got my dealer to agree to change my wireless charging pad in my 2021 R4P XSE PP. I brought my R4P in for its 5k service on Feb 14. I asked them to check the charging pad while in for service. I was told "it works". Brought R4P back in on April 11 for the DCM software update TSB. I again asked to havd the pad checked. The tech brought me out to the car and showed me an iPhone 13 and then my iPhone 13 Pro charging on the charging pad. Drove away and within a block of the dealership the pad started not working with the orange light flashing. I was ready to give up. Brought the R4P back in today April 20 for the Traction control software recall. I asked them to check the charging pad again and lo and behold they said it is not working correctly and they are ordering the part to replace my malfunctioning charging pad. It is back ordered so I was told to expect about a two week wait. I'm hoping this will fix it! Kudos to Westbury Toyota.
 
#34 ·
This is the exact reason that I will not pursue installing a Qi charging unit. No wireless carplay/android auto ability. When you plug in the lightning cable, the Qi becomes pointless as the lightning cable is now what is charging the phone. Now, if you never go on road trips and don't need the maps ability, then sure, Qi charging can be of use.
 
#39 · (Edited)
I did almost the same today using these parts:

Toyota Storage Tray 58813-0R060-C2

Coolgear Hard-wired USB charger:
https://www.amazon.com/dp/B084P83JNW

CarTrimHome USB charger:

Apple MagSafe charger:

MagSafe Charger Stand


It took a couple of days because I don't have a tool to cut through the thick plastic of the Toyota Storage Tray so I had to bring it to a machine shop so they could do the cutting. The MagSafe Charger Stand from Amazon was used only as a stencil to cut the opening into the Toyota Storage Tray. The gray, silicone trim on the stand was also re-used in the final assembly so that any adhesive wouldn't be needed to secure the MagSafe charger in the tray.

After the Toyota Storage Tray was ready:

- I began by wiring the plug-and-play harness from the CarTrimHome USB charger, to the green power cable receptacle of the Coolgear hard-wired USB charger. Cut off the connector on the plug-and-play harness and inserted the bare red and black wire ends into the green power cable receptacle. Plugged the power receptacle into the Coolgear charger.

- After that, it was plug-and-play. Connected the harness to the 12V cigarette lighter outlet's plug, then the other side to the now wired power cable receptacle of the Coolgear.

- Plugged the Magsafe charger into the Coolgear.

- Placed the Coolgear all the way into the back of the area beneath the tray where there's an opening that's just the right size for it to sit in.

- Turned the Prime on and placed my iPhone on the Magsafe charger to test.


Image


Image