Toyota RAV4 Forums banner
1 - 20 of 25 Posts

KTL

· Registered
Joined
·
1,434 Posts
Discussion starter · #1 · (Edited)
The backup camera wasn't an available option for the '06-'08 years, and since there had been a few discussions regarding the backup camera installation, I'll post my experience and pictures from before. I originally had installed a wireless backup camera with an external display, but have since changed to a Natika wired version connected to a Pioneer headunit.

The post is separated into 3 parts to separate the instructions and pictures out.

PART 1 - Camera

Remove the back door top and side panels.
158072


The bottom panel's clips are popped out and back door light disconnected.
158073


The camera is mounted similar to where the OEM is, next to the license plate light. A hole was enlarged to fit the threaded shaft of the camera through and wiring was fit through an existing location.
158075


Split loom was fitted over the wiring to prevent it from being pinched while zip tied.
158077
 
Discussion starter · #2 · (Edited)
I wanted to tap into the backup wiring in the taillight, so I had removed these panels.

Part 2 - Panels

Pop up and remove the rear floor panel by the back door.
158078


Pop up and remove the rear passenger scuff plate.
158079


Move the rear seats forward and remove the hidden storage cover to expose the shallow storage area. Remove 4 Phillips screws, pop the panel up from the floor, and remove the storage.
158080


Remove two 14mm and one 10mm bolts.
164878


Remove the three Phillips screws.
158082


Remove the rear seat pivot trim clip.
158083


The entire lower panel can now be popped out and removed.
158084
 
Discussion starter · #3 · (Edited)
Part 3 - Wiring

The taillight assembly is held in by three 10mm nuts, two are exposed, but one is recessed, be careful not to drop it.
158085


Pull out the back door grommet and fish the wiring through.
158087


You'll need a good yank to pull the taillight out. I used t-taps to make the connections.
BLACK = Reverse +12V
WHITE/BLACK = GND
158090


The camera video connector also has a red wire attached to it, which gets routed to behind the radio. The RCA/composite plugs into the radio while the red wire, which was tapped at the taillight, connects to the reverse input of the radio.
158091


Test to make sure it functions properly before putting everything back together. The camera has the lines by default, but a wire loop can be cut to disable them.
158092
 
Thank you for this! I made it a sticky thread!
 
Discussion starter · #5 ·
Here are some auxiliary information pertaining to the wiring and OEM setup.

Interior Fuse Panel
PART 2 and 3 can be quite a task to get to the taillight just for the wiring, an alternative method would be extending the wiring and tap it by the interior fuse panel as indicated by this post.

OEM Camera to Aftermarket Radio
This post shows how the OEM camera video feed can be displayed to an aftermarket radio.

Aftermarket Camera to OEM Rearview Mirror
This post shows how the video feed from the aftermarket camera can be displayed to the OEM rearview mirror that supports it.
 
Discussion starter · #7 ·
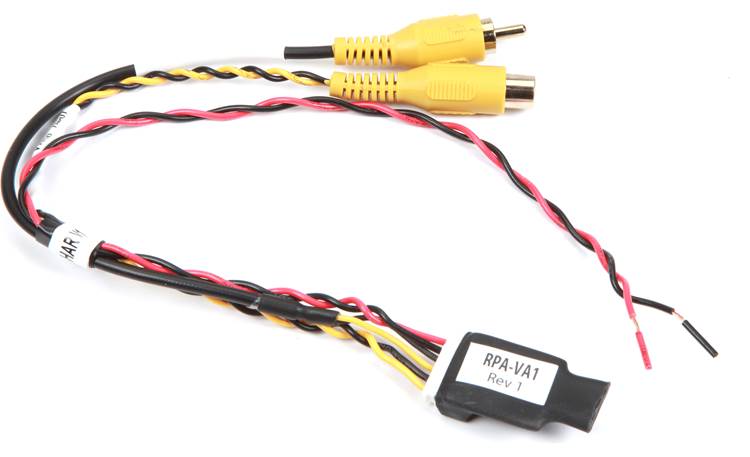
I bought the RPA-VA1 to try it out in the '12 HL with the factory camera. It took me a few hours to disconnect previous wiring, add some Molex pins and connectors, and solder new wiring. I didn't cut the RCA receptacle used for input to the converter, just made a new cable that interface with the CV+/CV- wires.
163511


There is an improvement in picture quality, but not significant.
163512
 
Discussion starter · #9 ·
I was having connectivity problems with the image not always showing up on the screen, so I got rid of the previous t-tap and wire wrap, soldered on new wires with connectors to have solid contact. Also tightened the male RCA ground sleeve at the radio so it would grab onto the radio input better.
164772
 
Hello, Is there anything regarding the installation of a back up camera that could effect the function of the radio? Specifically the AUX? I bought a 09 Rav and realized the AUX doesn't work. I've replaced the AUX jack as that's the most likely culprit. But it still doesn't go into AUX mode. The previous owner installed a back up camera....I'm just trying to figure out if there was a possibility that he screwed something up.
 
1 - 20 of 25 Posts